Table of Contents
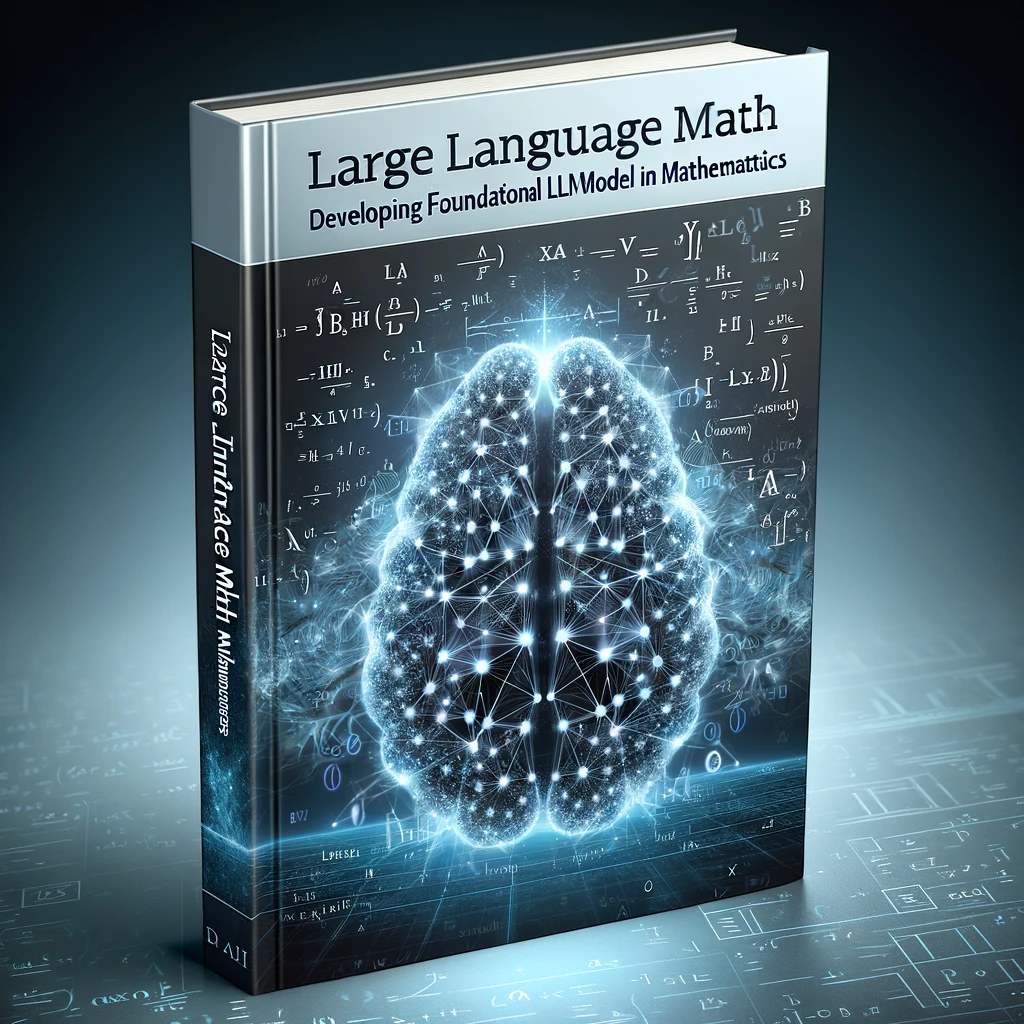
Large Language Math
The Mathematics of LLM Foundational Models - For Beginners
Mission Statement
The llmath project is dedicated to demystifying the complex mathematics underpinning Large Language Models (LLM). Our goal is to empower beginners with the necessary mathematical skills and knowledge to contribute to the development of this alien intelligence 👽.
Who is this Book For?
This book is designed with beginners in mathematics in mind, especially those who are keen to explore the fascinating world of Large Language Models (LLMs) through the lens of mathematics. Whether you have a basic understanding of mathematics or are starting from scratch, this book is for you.
Status
- Stage: Early Development
- Focus: Building foundational content
- Edition: 2024
Availability
- HTML: https://llmath.unnservice.com/
- PDF: #[TODO]
Emphasis on R Programming Language
Our journey will primarily utilize the R programming language as our tool for executing and understanding mathematical concepts. R is renowned for its powerful capabilities in statistical computing and graphics, making it an ideal choice for exploring the mathematics of Large Language Models (LLMs).
In addition to R, we will be leveraging Emacs Org mode extensively. Org mode is a unique and powerful feature of Emacs, providing an integrated environment for literate programming. It allows us to write documentation and executable R code in the same document, facilitating a seamless learning and development experience. This approach enables us to not only document the mathematical concepts but also to interactively execute and explore them using R within the Org mode environment.
Join the project
Feel free to contact me to join the project.
Table of Contents
Introduction
Before diving into the mathematical concepts and experiments in this book, it's essential to set up your R environment correctly. R, a powerful language for statistical computing and graphics, will be our tool for live experimentation and visualization in math. This setup guide assumes that you have R already installed on your system.
Why R?
- Interactive Learning: R allows for interactive experimentation with mathematical concepts, enhancing understanding.
- Visualization: With R, you can visualize complex mathematical functions and data, making abstract concepts more tangible.
- Accessibility: R is open-source and widely used, making it an accessible choice for learners.
Installing the ggplot2 Package
Open your R interpreter. You can do this by running the 'R' command in your terminal, and install the libraries used in this book for the examples and experimentation.
ggplot2
ggplot2 is a widely used R package for creating complex and beautiful plots. It's an essential tool for visualizing mathematical functions and data in this book.
install.packages("ggplot2")
Verifying the Installation
To ensure that ggplot2 is installed correctly and ready for use, you can load the package and create a simple plot:
library(ggplot2)
ggplot(data.frame(x = 1:10, y = 1:10), aes(x, y)) + geom_line()
If you the following line plot without errors, your ggplot2 installation is successful.
polynom
install.packages("polynom")
Table of Contents
Algebra forms the backbone of modern computational theories and applications, playing a crucial role in the development of foundational models for Large Language Models (LLMs). Understanding algebra is essential for anyone delving into the field of artificial intelligence, particularly in the development and refinement of sophisticated models like GPT (Generative Pre-trained Transformer).
Importance in LLM Foundational Model Development
Algebraic concepts provide the mathematical framework necessary for understanding and manipulating the underlying structures and functions that drive LLMs. From basic operations like addition and multiplication to more complex functions and equations, algebra enables developers to model the intricate patterns of language and thought processes. The ability to abstract and generalize patterns using algebraic expressions and equations is central to the design of algorithms that underpin LLMs.
In the context of LLMs, algebra is used to:
- Model Relationships: Representing and understanding the relationships between different elements of language, such as words, phrases, and sentences.
- Optimize Algorithms: Enhancing the efficiency of algorithms through algebraic simplification and transformation techniques.
- Data Analysis: Algebraic tools are indispensable in analyzing and interpreting the vast amounts of data used to train and test these models.
- Algorithm Development: Algebraic structures form the basis of many algorithmic approaches used in machine learning and natural language processing.
Relevance to AI and Machine Learning
The principles of algebra are not just foundational to understanding LLMs but are also broadly applicable in various AI and machine learning contexts. They aid in:
- Pattern Recognition: Identifying and abstracting patterns, a key component of learning algorithms.
- Statistical Analysis: Algebraic concepts underlie many statistical methods used in machine learning.
- Optimization Problems: Solving optimization problems that are central to machine learning model training.
Conclusion
In conclusion, algebra is not just a set of mathematical tools; it's a language that articulates the complexity of AI models, including LLMs like GPT. Its role extends from basic data manipulation to advanced algorithm development, making it an indispensable part of AI and machine learning education.
Table of Contents
Table of Contents
- Introduction to Variables
- What is a Variable?
- Examples of Variables
- Variables in Algebraic Expressions
- Variables in R Programming
- Conclusion
Introduction to Variables
Variables are fundamental elements in algebra that represent unknown values. They are usually denoted by letters such as \( x \), \( y \), and \( z \).
What is a Variable?
- Definition: A variable is a symbol used to represent an unknown or arbitrary number.
- Usage: In algebra, variables are used in expressions, equations, and functions.
Examples of Variables
- Simple Variable: \( x \)
- Complex Variable: \( a_1, b_2, c_3 \)
Complex variables allow for the extension of real numbers in algebra to solve equations that haave no real number solutions, like \( x^2 = -1 \).
Complex numbers can be represented on the complex plane, where the horizontal axis represents real numbers from negative to positive, and the vertical axis represents the imaginary part.
Variables in Algebraic Expressions
- Example 1: \( 2x + 3 \)
- Example 2: \( a^2 + b^2 \)
Variables in R Programming
-
Using R, we can assign values to variables and perform algebraic operations. The following examples demonstrate this concept.
x <- 5 y <- 3 result <- 2 * x + y print(result)
Conclusion
Variables are placeholders for numbers. They allow us to write general expressions that can be solved for many different values.
# Another example with variables in R
a <- 4
b <- 2
expression_result <- a^2 + b
print(expression_result)
Table of Contents
- Introduction to Constants
- Characteristics of Constants
- Examples of Constants
- Using Constants in R
- Conclusion
Introduction to Constants
Constants are fixed values that do not change. In algebra, constants are often represented by letters, but their value remains the same throughout an equation or a problem. Common examples include numbers like \( 2, -5, \frac{3}{4} \), and mathematical constants like \( \pi $\)and \( e \).
Characteristics of Constants
- Fixed Value: A constant represents a specific, unchanging number.
- Symbol Representation: While they can be represented by any symbol, they are often denoted by letters like \( c, d, k \).
Examples of Constants
- The number \( 5 $\)in the expression \( 5x + 3 $\)is a constant.
- In the formula for the circumference of a circle, \( C = 2\pi r \), \( \pi $\)is a constant approximately equal to \( 3.14159 \).
Using Constants in R
Constants can be used in R to perform calculations. Below are examples demonstrating how to work with constants in R.
# Define a constant
a <- 5

# Use the constant in an expression
result <- a * 2 + 3
print(result)

# Mathematical constant pi
circumference <- 2 * pi * 10
print(circumference)
Conclusion
Understanding constants is fundamental in algebra. They are used in various mathematical formulas and expressions, and recognizing them is crucial in solving algebraic equations.
Table of Contents
Algebraic expressions are combinations of variables, constants, and operations. In this section, we will explore how these expressions are formed and manipulated.
Algebraic Expressions
Definition
An algebraic expression is a mathematical phrase that can contain ordinary numbers, variables (like x or y) and operators (like add, subtract, multiply, and divide).
Components of an Expression
- Variables: Symbols that represent numbers. E.g., x, y, z.
- Constants: Fixed values. E.g., 3, -5, 2/3.
- Operators: Symbols that represent operations. E.g., + (addition), - (subtraction), * (multiplication), / (division).
Examples of Expressions
- \( 3x + 4 \)
- \( 5y - 7 \)
- \( 2x^2 + 3x - 5 \)
Simple Operations in R
We will use R to perform some basic operations on algebraic expressions.
Addition Example
x <- 2 # Assign a value to x
expression <- 3 * x + 4
print(expression)
Subtraction Example
y <- 5 # Assign a value to y
expression <- 5 * y - 7
print(expression)
Polynomial Example
Polynomials will be explained in further chapters, but it's also an expression.
x <- 1 # Assign a value to x
expression <- 2 * x^2 + 3 * x - 5
print(expression)
Conclusion
Understanding algebraic expressions is fundamental in algebra. They form the basis for more complex topics like equations, functions, and beyond.
Table of Contents
Expressions and Operators
Algebraic expressions are combinations of variables, numbers, and operators. Operators are symbols that represent mathematical operations such as addition, subtraction, multiplication, and division.
Basic Operators
- Addition (+)
- Subtraction (-)
- Multiplication (*)
- Division (/)
Algebraic Expressions
An algebraic expression combines both numbers (constants) and variables with operators. For example, in the expression \( 3x + 4 \), \( 3x $\)and \( 4 $\)are terms, \( x $\)is a variable, \( 3 $\)and \( 4 $\)are coefficients and constants, respectively, and \( + $\)is an operator.
Examples of Algebraic Expressions
- \( 2x + 3y \)
- \( 4a - 7b \)
- \( 5x^2 + 3x - 4 \)
R Examples Using Org-Babel
We will demonstrate some basic algebraic operations using R.
Addition Example in R
x <- 5
y <- 3
x + y
Subtraction Example in R
x <- 10
y <- 4
x - y
Multiplication Example in R
a <- 7
b <- 2
a * b
Division Example in R
a <- 20
b <- 4
a / b
Conclusion
Understanding algebraic expressions and operators is fundamental in algebra. It involves knowing how to combine variables and constants with basic arithmetic operations to form expressions.
Table of Contents
- Introduction
- Basic Concepts of Addition
- Addition Properties
- Examples in R Programming
- Practice
- Conclusion
Introduction
Addition is one of the fundamental operations in algebra. It involves the process of calculating the total or sum of two or more numbers or variables. The symbol used to denote addition is \(+\).
Basic Concepts of Addition
- Number Addition: The process of adding two or more numbers. For example, \(2 + 3 = 5\).
- Variable Addition: In algebra, variables are symbols that represent numbers. When variables are similar, they can be added directly. For example, \(x + x = 2x\).
- Mixed Addition: Involves both numbers and variables. For instance, \(3 + x$\)where \(x$\)is a variable.
Addition Properties
- Commutative Property: The order of numbers does not change the sum. For example, \(a + b = b + a\).
- Associative Property: The way numbers are grouped in an addition problem does not change the sum. For example, \((a + b) + c = a + (b + c)\).
Examples in R Programming
# Example of number addition
sum1 <- 2 + 3
print(sum1)

# Example of variable addition
x <- 4
y <- 5
sum2 <- x + y
print(sum2)

# Example using commutative property
a <- 7
b <- 3
sum3 <- a + b
sum4 <- b + a
print(sum3 == sum4)
Practice
- Compute \(5 + 8\).
- If \(x = 6\), find the value of \(x + 9\).
- Verify the commutative property with \(a = 4$\)and \(b = 10\).
Conclusion
Understanding addition is crucial as it forms the basis of more complex algebraic concepts. Mastery of addition, including its properties and operations with variables, is essential for progressing in algebra.
Table of Contents
Subtraction is one of the fundamental operations in algebra. It represents the operation of removing objects from a collection. The result of a subtraction is called a "difference."
Definition
The subtraction of two numbers is the operation of finding the difference between them. If \( a $\)and \( b $\)are two numbers, the subtraction of \( b $\)from \( a $\)is written as \( a - b \).
Properties
- Subtraction is not commutative, i.e., \( a - b \neq b - a $\)in general.
- Subtraction is not associative, i.e., \( (a - b) - c \neq a - (b - c) $\)in general.
Examples in Algebra
- If \( x = 10 $\)and \( y = 5 \), then \( x - y = 10 - 5 = 5 \).
- In terms of variables, \( a - b $\)simply represents the difference between \( a $\)and \( b \).
R Programming Examples
# Example 1: Subtraction of two numbers
a <- 10
b <- 5
difference <- a - b
print(difference)

# Example 2: Subtraction with variables
x <- 15
y <- 7
result <- x - y
print(result)
Practice
- If \( a = 8 $\)and \( b = 3 \), what is \( a - b \)?
- Find the difference between \( x $\)and \( 2x \).
In this expression, \( x $\)and \( 2x $\)are like terms because they both have \( x $\)as the variable part. To combine them, we add their coefficients (keeping in mind the signs). The coefficient of \( x $\)is 1 (since \( x $\)is the same as \( 1x \)).
\( x \), or explicitly \( 1x \),can be read a "one quantity of X", so the practice problem can be read as "the subtraction of 2 quantities of \( x $\)from 1 quantity of \( x \)".
- Find the difference between \( 1x $\)and \( x \)
Table of Contents
Multiplication is one of the fundamental operations in algebra. It involves combining equal groups to find the total number of items. The multiplication of two numbers is equivalent to adding one of the numbers to itself repeatedly based on the value of the other number.
Basic Definition
The multiplication of two numbers \( a $\)and \( b $\)is denoted as \( a \times b $\)or \( ab \). Here, \( a $\)and \( b $\)are called the multiplicands.
- For example, \( 3 \times 4 $\)means adding 3 four times: \( 3 + 3 + 3 + 3 = 12 \).
Properties of Multiplication
- Commutative Property: \( a \times b = b \times a \)
- Associative Property: \( (a \times b) \times c = a \times (b \times c) \)
- Distributive Property: \( a \times (b + c) = a \times b + a \times c \)
Multiplication with Variables
When dealing with variables, the same principles apply. For instance, \( x \times y $\)represents adding \( x $\)\( y $\)times, or vice versa.
Examples in R
Below are some examples demonstrating multiplication using the R programming language.
# Multiplying two numbers
3 * 4

# Multiplying variables
a <- 5
b <- 6
a * b
Practice
- Calculate \( 7 \times 8 \).
- If \( x = 3 $\)and \( y = 4 \), find the value of \( 2xy \).
Table of Contents
- Basic Division Operation
- Division by Zero
- Examples of Division
- Division in Algebraic Expressions
- Division Properties
- Practice
Division is one of the four basic operations of arithmetic, the others being addition, subtraction, and multiplication. In division, we split a number (the dividend) by another number (the divisor) to find how many times the divisor fits into the dividend.
In mathematical terms, if we have a dividend \( a $\)and a divisor \( b \), the division is the operation of finding a quotient \( q $\)such that \( a = b \times q \).
Basic Division Operation
In its simplest form, division can be represented as: \\($ \frac{a}{b} = c $\) where \( a $\)is the dividend, \( b $\)is the divisor, and \( c $\)is the quotient.
Division by Zero
It's important to note that division by zero is undefined. For any number \( a \), \\($ \frac{a}{0} $\) is not defined.
Examples of Division
Below are examples demonstrating division using the R programming language.
# Example 1: Simple division
dividend1 <- 10
divisor1 <- 2
quotient1 <- dividend1 / divisor1
print(quotient1)

# Example 2: Division resulting in a fraction
dividend2 <- 15
divisor2 <- 4
quotient2 <- dividend2 / divisor2
print(quotient2)

# Example 3: Division by zero (will result in an error)
dividend3 <- 5
divisor3 <- 0
quotient3 <- dividend3 / divisor3
print(quotient3)
Division in Algebraic Expressions
Division is often seen in algebraic expressions. For example, in the expression \\($ \frac{x + 2}{y - 3} $\) \( x $\)and \( y $\)are variables, and the expression represents the division of the quantity \( x + 2 $\)by \( y - 3 \).
Division Properties
- Commutative Property: Division is not commutative. That is, \( a \div b \neq b \div a \).
- Associative Property: Division is not associative. Changing the grouping of the numbers in a division operation changes the result.
- Distributive Property: Division distributes over addition and subtraction in the following way: \\($ \frac{a \pm b}{c} = \frac{a}{c} \pm \frac{b}{c} $\)
Practice
- Divide 42 by 7.
- If \( \frac{x}{5} = 3 \), what is the value of \( x \)?
- Solve for \( y $\)in the equation \( \frac{2y + 4}{y - 1} = 3 \).
This is not a simple division operation but rather an algebraic equation involving division. As the division is the operation of finding the quotient of the dividend by a divisor, you can reverse the division by multiplying by the quotient \( (y - 1) \):
\\($ (2y + 4) = 3(y - 1) $\)
Next, we can expand and simplify both sides of the equation with the distributive property of multiplication over division and sibtraction. The distributive property state that for any numbers \( a \), \( b \), and \( c \), the equation \( a(b+c) = ab + ac $\)holds true. The distributive property also holds true for subtraction where \( (a(b-c) = ab - ac) $\)so that we can distribute \( 3(y - 1) $\)over \( 3y - 3 $\)to simplify the equation as
\\($ 2y + 4 = 3y - 3 $\)
Now we can isolate \( y $\)by moving all terms involving \( y $\)to one side of the equation and the constant terms to the other side
\\($ 2y - 3y = -3 - 4 $\)
The process of moving terms from one side of the equation to the other without breaking the equation is based on the fundamental principle of equality in algebra. The principle states that if you perform the same operation on both sides of the an equation, the equation remain valid or "balanced".
Simplifying furthe
\\($ -y = -7 $\)
or finally
\\($ y = 7 $\)
Remember, practice is key to mastering division in algebra.
Table of Contents
The acronym PEMDAS helps to remember the order of operations in algebra. It stands for Parentheses, Exponents, Multiplication and Division (from left to right), Addition and Subtraction (from left to right).
Parentheses
First, perform all operations inside parentheses.
\\($ (a + b) \times c $\)
Exponents
Then, solve the exponents (or powers).
\\($ a^b $\)
Multiplication and Division
Next, perform multiplication and division from left to right.
\\($ \frac{a \times b}{c} $\)
Addition and Subtraction
Finally, perform addition and subtraction from left to right.
\\($ a + b - c $\)
Examples in R
Let's see some examples of these operations using R programming language.
Evaluating an expression with all operations.
# Expression: (3 + 2) ^ 2 - 4 * 2
result <- (3 + 2) ^ 2 - 4 * 2
print(result)
Evaluating a more complex expression.
# Expression: ((2 * 3) - (4 / 2)) ^ 2 + 6
result <- ((2 * 3) - (4 / 2)) ^ 2 + 6
print(result)
You should know PEMDAS by heart, the order of operations is crucial for correctly solving algebraic expressions.
Table of Contents
Table of Contents
- Introduction
- Simple Equations: Definition and Examples
- Solving Simple Equations
- Examples in R Programming
Introduction
Understanding simple equations is a fundamental aspect of algebra. This document aims to introduce the concepts of simple equations, demonstrate how to solve them, and provide practical examples using the R programming language.
Simple Equations: Definition and Examples
A simple equation is a mathematical statement that asserts the equality of two expressions. These equations typically involve a variable, which we solve for.
A simple linear equation: \( ax + b = 0 \)
Where \(a$\)and \(b$\)are constants, and \(x$\)is the variable.
Solving Simple Equations
The goal is to isolate the variable (usually \(x\)) on one side of the equation. This involves applying inverse operations to both sides of the equation to keep the equation balanced.
Addition and Subtraction
To get rid of a number added to \(x\), we subtract the same number from both sides of the equation.
Multiplication and Division
If \(x$\)is multiplied by a number, we divide both sides of the equation by that number.
Examples in R Programming
We can use R to solve simple equations. Below are examples demonstrating this.
Example 1: Solving \( 2x + 3 = 7 \)
# Define the equation
solve_equation <- function(a, b, c) {
  (c - b) / a
}

# Solve 2x + 3 = 7
solve_equation(2, 3, 7)
Example 2: Solving \( 5x - 4 = 16 \)
# Solve 5x - 4 = 16
solve_equation(5, -4, 16)
Table of Contents
Introduction
In this section, we'll learn about balancing and simplifying algebraic equations. These are crucial techniques for solving equations effectively.
Balancing Equations
What is Balancing?
- Balancing an equation means ensuring that the expressions on both sides of the equation are equal.
- It involves adding, subtracting, multiplying, or dividing both sides of the equation by the same amount.
Example: Balancing an Equation
- Consider the equation: \( x + 3 = 7 \).
- To balance, subtract the constant 3 from both sides: \( x + 3 - 3 = 7 - 3 \), which simplifies to \( x = 4 \).
Simplifying Equations
What is Simplifying?
- Simplifying an equation means reducing it to its simplest form.
- This often involves combining like terms and eliminating unnecessary parts.
Example: Simplifying an Equation
- Consider the equation: \( 2x + 3x - 5 = 6 \).
- Combine like terms: \( 5x - 5 = 6 \).
Practice
- Balance and solve the equation: \( 2x + 5 = 3x + 2 \).
- Simplify and solve the equation: \( 4x + 2x - 10 = 12 \).
Table of Contents
Introduction to Multi-Step Equations
Multi-step equations are algebraic equations that require more than one step to solve. These types of equations often involve multiple operations, such as addition, subtraction, multiplication, and division.
Key Concepts
- Balancing the equation: What you do to one side of the equation, you must do to the other.
- Order of operations: Follow PEMDAS (Parentheses, Exponents, Multiplication and Division, Addition and Subtraction) rules.
- Isolating the variable: The goal is to get the variable on one side of the equation.
Solving Multi-Step Equations
@TODO: multiple detailed explanations step-by-step
Practice Problems
Solve the following equations:
- \( 4x - 7 = 21 \)
- \( 5(x + 3) = 2x + 20 \)
- \( 3x/2 - 6 = 9 \)
Table of Contents
- Introduction
- Key Concepts
- Solving Linear Systems
- Example: Solving a Linear System using R
- Practice
- Conclusion
Introduction
Systems of equations are fundamental in algebra. They consist of two or more equations with a common set of variables. The goal is to find values for these variables that satisfy all equations in the system simultaneously.
A single equation can only convey so much information. When multiple equations are combined into a system, they can describe more complex situations. For example, a single linear equation defines a line in a two-dimensional space, but a system of two linear equations can describe the interaction between two lines, such as whether they intersect, are parallel, or are the same line.
When you have more than one variable, a single equation usually isn't sufficient to determine specific values for those variables. By having a system of equations, you provide enough information to solve for each variable. The study of systems of equations involves understanding different types of solutions that can occur. For example, a system of linear equations can have exactly one solution (the lines intersect at a single point), no solution (the lines are parallel and never intersect), or infinitely many solutions (the lines are identical).
Key Concepts
- A system of linear equations involves only linear equations.
- A system of non-linear equations includes at least one non-linear equation.
- Common methods for solving these systems include substitution, elimination, and graphical methods.
Solving Linear Systems
Substitution Method
- Solve one equation for one variable and substitute this value into the other equation(s).
Elimination Method
- Combine equations to eliminate one variable, making it easier to solve for the remaining variables.
Graphical Method
- Plot each equation on a graph and find the intersection point(s).
Example: Solving a Linear System using R
Consider the system of equations:
- Equation 1: \( x + y = 10 \)
- Equation 2: \( 2x + 3y = 30 \)
We can solve this using R programming:
A <- matrix(c(1, 1, 2, 3), nrow = 2, byrow = TRUE)
b <- c(10, 30)
solution <- solve(A, b)
cat("The solution is x =", solution[1], "and y =", solution[2], "\n")
Practice
-
Solve the following system of equations using any method:
- \( 3x - y = 7 \)
- \( 2x + 4y = -8 \)
-
Graphically solve the system:
- \( x^2 + y^2 = 25 \)
- \( y = x + 5 \)
Conclusion
Understanding and solving systems of equations is crucial in algebra, with applications across various scientific and engineering fields. Mastery of these systems aids in modeling and solving real-world problems where multiple conditions are interconnected.
Table of Contents
Table of Contents
- Introduction
- Definition of a Function
- Basic Function Terminology
- Evaluation of Functions
- Linear Function Example
- Quadratic Function Example
- Practice
Introduction
Functions are fundamental to algebra and mathematics in general. They describe how one quantity depends on another.
Definition of a Function
A function is a relation between a set of inputs and a set of permissible outputs. For each input, there is exactly one output. Functions are often expressed as \( f(x) $\)where \( x $\)is the input and \( f(x) $\)is the output.
Basic Function Terminology
- Domain: The set of all possible input values.
- Range: The set of all possible output values.
- f(x): The function notation, where \( x $\)is the input and \( f(x) $\)is the output.
Evaluation of Functions
To evaluate a function means to find the output for a given input.
Linear Function Example
-
A linear function can be represented as \( f(x) = mx + b \).
-
Example: \( f(x) = 2x + 3 \), where \( m = 2 $\)and \( b = 3 \).
f <- function(x) { return(2 * x + 3) }
x_values <- seq(-10, 10, by = 0.1) y_values <- sapply(x_values, f)
plot(x_values, y_values, type = "l", main = "Linear Function: f(x) = 2x + 3", xlab = "x", ylab = "f(x)", col = "blue")
Quadratic Function Example
- A quadratic function is represented as \( f(x) = ax^2 + bx + c \).
This formula is a standard representation where \( a \), \( b \), and \( c $\)are constants, and aa is not zero. The function describes a parabola in the coordinate plane. The values of \( a \), \( b \), and \( c $\)determine the specific shape and position of the parabola.
-
Example: \( f(x) = x^2 - 4x + 3 \), with \( a = 1 \), \( b = -4 \), and \( c = 3 \).
a <- 1 b <- -4 c <- 3
f <- function(x) { return(a * x^2 + b * x + c) }
x_values <- seq(-2, 5, by = 0.1) y_values <- sapply(x_values, f)
plot(x_values, y_values, type = "l", main = "Quadratic Function: f(x) = x^2 - 4x + 3", xlab = "x", ylab = "f(x)", col = "red")
Practice
- Define a function \( g(x) = x^3 - 4x + 6 $\)and evaluate it at \( x = 2 \).
- For the function \( h(x) = 2x^2 - 5x + 3 \), find the output when \( x = -1 \).
Table of Contents
In this document, we will explore the concepts of domain and range in the context of algebraic functions.
Domain and Range of a Function
- Domain: The set of all possible input values (usually 'x') which the function can accept.
- Range: The set of all possible output values (usually 'f(x)') that the function can produce.
LaTeX notations:
- Domain: \( D(f) \)
- Range: \( R(f) \)
Example 1: Linear Function
Consider a simple linear function \( f(x) = 2x + 3 \).
Domain
- The domain of a linear function is all real numbers, as there are no restrictions on the value of 'x'.
- \( D(f) = {x \in \mathbb{R}} \)
Range
- The range is also all real numbers because a linear function can produce any real value as output.
- \( R(f) = {f(x) \in \mathbb{R}} \)
R Code Example
f <- function(x) { 2*x + 3 }
# Example values
x_values <- c(-10, 0, 10)
y_values <- sapply(x_values, f)
print(y_values)
Example 2: Quadratic Function
Consider a quadratic function \( f(x) = x^2 - 4 \).
Domain
- Similar to a linear function, the domain of a quadratic function is all real numbers.
- \( D(f) = {x \in \mathbb{R}} \)
Range
- The range of this quadratic function is all real numbers greater than or equal to -4, since the lowest value of \( f(x) $\)is -4 (when \( x = 0 \)).
- \( R(f) = {f(x) \in \mathbb{R} | f(x) \geq -4} \)
R Code Example
f <- function(x) { x^2 - 4 }
# Example values
x_values <- c(-3, 0, 3)
y_values <- sapply(x_values, f)
print(y_values)
Table of Contents
Introduction
In this section, we explore the various types of functions in algebra and their unique properties. Understanding these functions is crucial for applications in various fields, including artificial intelligence.
Types of Functions
** Linear Functions
- Definition: A linear function is a function of the form \( f(x) = mx + b \), where \( m $\)and \( b $\)are constants.
- Example: \( f(x) = 2x + 3 \)
- Properties: Linear functions have a constant rate of change and graph to a straight line.
** Quadratic Functions
- Definition: A quadratic function is of the form \( f(x) = ax^2 + bx + c \), where \( a \), \( b \), and \( c $\)are constants and \( a \neq 0 \).
- Example: \( f(x) = x^2 - 4x + 4 \)
- Properties: Quadratic functions have a parabolic graph and a vertex. They represent accelerated growth or decay.
** Exponential Functions
- Definition: Exponential functions have the form \( f(x) = a \cdot b^x \), where \( a $\)and \( b $\)are constants and \( b > 0 \).
- Example: \( f(x) = 2 \cdot 3^x \)
- Properties: Exponential functions grow or decay at a rate proportional to their current value.
R Examples and Plots
library(ggplot2)
x <- seq(-10, 10, by = 0.1)
y <- 2 * x + 3
ggplot(data.frame(x, y), aes(x, y)) + geom_line() + ggtitle("Linear Function: f(x) = 2x + 3")

y <- x^2 - 4*x + 4
ggplot(data.frame(x, y), aes(x, y)) + geom_line() + ggtitle("Quadratic Function: f(x) = x^2 - 4x + 4")

y <- 2 * 3^x
ggplot(data.frame(x, y), aes(x, y)) + geom_line() + scale_y_log10() + ggtitle("Exponential Function: f(x) = 2 * 3^x")
Conclusion
Understanding the types and properties of functions in algebra is essential for mathematical literacy and application in various fields. Through the examples and plots, we can visually appreciate the behavior of these functions.
Table of Contents
Introduction
Graphing functions is a fundamental skill in algebra that helps in visualizing the relationship between variables. This document will guide you through the basics of graphing functions, with examples in R programming language.
Basic Concepts
What is a Function?
A function is a relationship between two variables, typically x (independent variable) and y (dependent variable), where each x value is associated with exactly one y value. LaTeX: \( y = f(x) \)
Why Graph Functions?
- To understand the behavior of the function.
- To find key features like intercepts, maxima, minima, and asymptotes.
- To solve equations graphically.
Graphing Functions using R
Example: Graphing a Linear Function
Let's graph the linear function \( y = 2x + 3 \).
library(ggplot2)
x <- seq(-10, 10, by = 0.1)
y <- 2 * x + 3
ggplot(data.frame(x, y), aes(x, y)) +
  geom_line() +
  ggtitle("Graph of y = 2x + 3") +
  xlab("x") + ylab("y")
Example: Graphing a Quadratic Function
Now, let's graph a quadratic function \( y = x^2 - 4x + 4 \).
library(ggplot2)
x <- seq(-10, 10, by = 0.1)
y <- x^2 - 4 * x + 4
ggplot(data.frame(x, y), aes(x, y)) +
  geom_line() +
  ggtitle("Graph of y = x^2 - 4x + 4") +
  xlab("x") + ylab("y")
Conclusion
Graphing functions is a crucial skill in algebra, providing a visual understanding of mathematical relationships. Through practice and the use of tools like R, you can gain deeper insights into the behavior of various functions.
Table of Contents
- Basic Transformation Types
- Translation
- Example: Horizontal and Vertical Shifts
- Stretching and Compressing
- Example: Stretching a Function
- Reflection
- Example: Reflection Over the X-Axis
- Conclusion
Functions are one of the key concepts in algebra, particularly useful in modeling relationships between variables. Transformations of functions involve changing their appearance in terms of their position, shape, and size.
Basic Transformation Types
- Translation
- Stretching and Compressing
- Reflection
- Rotation (less common in basic algebra)
Translation
Translation moves the graph of the function without changing its shape. It involves shifting the function's graph horizontally, vertically, or both.
Let \( f(x) $\)be a function. A translation of \( f(x) $\)can be represented as \( g(x) = f(x - h) + k $\)where \( h $\)and \( k $\)are constants representing horizontal and vertical shifts, respectively.
Example: Horizontal and Vertical Shifts
-
Horizontal Shift: \( g(x) = f(x - h) \)
-
Vertical Shift: \( g(x) = f(x) + k \)
library(ggplot2) x <- seq(-10, 10, by = 0.1) f <- function(x) x^2 g <- function(x) (x - 2)^2 + 3
df <- data.frame(x = x, Original = f(x), Translated = g(x))
ggplot(df) + geom_line(aes(x = x, y = Original, color = "Original")) + geom_line(aes(x = x, y = Translated, color = "Translated")) + labs(title = "Function Translation", x = "x", y = "y") + theme_minimal() + scale_color_manual(values = c("blue", "red"))
![]()
Stretching and Compressing
Stretching or compressing a function alters its steepness or width. This is achieved by multiplying the function by a factor.
A stretched or compressed function \( g(x) $\)of \( f(x) $\)can be written as \( g(x) = a \cdot f(x) $\)where \( a $\)is a constant. If \( |a| > 1 \), the function is stretched. If \( |a| < 1 \), it is compressed.
Example: Stretching a Function
h <- function(x) 2 * f(x) # Stretching the function by a factor of 2
df$Stretched <- h(x)

ggplot(df) +
  geom_line(aes(x = x, y = Original, color = "Original")) +
  geom_line(aes(x = x, y = Stretched, color = "Stretched")) +
  labs(title = "Function Stretching", x = "x", y = "y") +
  theme_minimal() +
  scale_color_manual(values = c("blue", "green"))
![]()
Reflection
Reflection flips the function over a given line, such as the x-axis or y-axis.
A reflection of \( f(x) $\)over the x-axis is given by \( g(x) = -f(x) \), and over the y-axis by \( g(x) = f(-x) \).
Example: Reflection Over the X-Axis
i <- function(x) -f(x) # Reflecting over the x-axis
df$Reflected <- i(x)

ggplot(df) +
  geom_line(aes(x = x, y = Original, color = "Original")) +
  geom_line(aes(x = x, y = Reflected, color = "Reflected")) +
  labs(title = "Function Reflection", x = "x", y = "y") +
  theme_minimal() +
  scale_color_manual(values = c("blue", "purple"))
![]()
Conclusion
Understanding and applying these transformations can greatly aid in visualizing and interpreting the behavior of functions, which is essential in various fields including data analysis and AI.
Table of Contents
Introduction to Function Composition
Function composition is a way of combining two or more functions to create a new function. In mathematical terms, if you have two functions \( f(x) $\)and \( g(x) \), their composition is denoted as \( (f \circ g)(x) = f(g(x)) \).
Basic Concepts
Definition
The composition of two functions \( f $\)and \( g $\)is defined as: \( (f \circ g)(x) = f(g(x)) \) It means, first apply \( g \), and then apply \( f $\)to the result of \( g \).
Notation
Function composition is denoted by a small circle between functions: \( f \circ g \).
Examples
Example 1: Basic Composition
Let's consider two functions \( f(x) = x^2 $\)and \( g(x) = x + 1 \). Find the composition \( (f \circ g)(x) \).
Solution:
\begin{align*} (f \circ g)(x) &= f(g(x)) \ &= f(x + 1) \ &= (x + 1)^2 \end{align*}
Example 2: Using R for Composition
We will define two functions in R and compute their composition.
f <- function(x) x^2
g <- function(x) x + 1

# Define the composition of f and g
composition <- function(x) f(g(x))

# Plot the composition
x_vals <- seq(-10, 10, by = 0.1)
plot(x_vals, sapply(x_vals, composition), type = 'l', main = "Plot of (f \\circ g)(x)", xlab = "x", ylab = "(f \\circ g)(x)")
Table of Contents
Table of Contents
Introduction
Inequalities are mathematical expressions involving the symbols > (greater than), < (less than), \(\geq$\)(greater than or equal to), and \(\leq$\)(less than or equal to). Unlike equations, inequalities do not show equality but rather a relation of greater or lesser value. In this document, we will explore how to solve simple inequalities.
Basic Concepts
What are Inequalities?
Inequalities are statements about the relative size or order of two objects. They are used to compare numbers and expressions. For example, \(x > 3$\)means that \(x$\)is greater than 3.
Types of Inequalities
- Greater than: \(x > a\)
- Less than: \(x < a\)
- Greater than or equal to: \(x \geq a\)
- Less than or equal to: \(x \leq a\)
Solving Simple Inequalities
General Rules
- You can add, subtract, multiply, or divide both sides of an inequality by the same positive number without changing the inequality.
- If you multiply or divide both sides by a negative number, reverse the inequality sign.
- Treat the inequality as an equation to find critical values, but remember the solution will be a range.
Examples
# Example 1: Solve x > 5
x <- seq(-10, 10, by = 0.1)
y <- x > 5
plot(x, y, type = 'l', main = "Graph of x > 5")
In this example, the solution is all values of \(x$\)greater than 5. The graph shows this as a line where values turn true after \(x = 5\).
Practice Problems
Solve the following inequalities:
- \(3x + 2 > 8\)
- \(5 - x \leq 2\)
- \(2x - 7 \geq -3\)
- \(-3x + 4 < 1\)
Conclusion
Solving simple inequalities is a fundamental skill in algebra. Understanding and practicing these concepts will help you in more advanced mathematical studies, especially in areas that require analyzing ranges and conditions.
Table of Contents
Graphing inequalities is an essential part of understanding algebraic concepts. It helps in visualizing the solutions to inequality equations on a number line or coordinate plane. Unlike equations, inequalities do not have just one solution, but rather a range of solutions.
What are Inequalities?
Inequalities are mathematical expressions involving the symbols < (less than), <= (less than or equal to), > (greater than), or >= (greater than or equal to). These symbols are used to compare two values or expressions. For example, \( x > 5 $\)means that x is greater than 5.
Graphing on a Number Line
Graphing an inequality on a number line gives a visual representation of all its possible solutions.
-
To graph \( x > 5 \), we would draw an open circle at 5 and shade the line to the right of 5, indicating all the numbers greater than 5.
library(ggplot2) ggplot(data.frame(x = c(0, 10)), aes(x)) + geom_segment(aes(xend = 10, y = 0, yend = 0)) + geom_point(aes(x = 5, y = 0), shape = 1) + geom_segment(aes(x = 5.1, xend = 10, y = 0, yend = 0), arrow = arrow(type = "open"))
Graphing on a Coordinate Plane
Inequalities with two variables, like \( y > 2x + 3 \), are graphed on a coordinate plane.
-
First, graph the equation \( y = 2x + 3 $\)as if it were an equality.
-
Since the inequality is \( y > 2x + 3 \), shade above the line to represent all the points where y is greater than \( 2x + 3 \).
library(ggplot2) ggplot(data.frame(x = c(-10, 10)), aes(x)) + stat_function(fun = function(x) 2x + 3) + geom_ribbon(aes(ymin = 2x + 3, ymax = 10), fill = "blue", alpha = 0.2)
Practice Problems
Try graphing the following inequalities:
- \( x <= 4 $\)on a number line.
- \( y < -x + 2 $\)on a coordinate plane.
Graphing inequalities is not just about drawing lines and shading areas; it represents a fundamental understanding of algebra and the solutions to inequalities. Practice is key to mastering this concept.
Table of Contents
Compound inequalities involve combining two inequalities into one statement using the words "and" or "or". Understanding how to solve and graph these inequalities is crucial in algebra.
Compound Inequalities
Definition and Types
- A compound inequality contains at least two inequalities joined by "and" (intersection) or "or" (union).
- Examples:
- "and" compound inequality: \(a < x < b\)
- "or" compound inequality: \(x < a$\)or \(x > b\)
Solving "And" Compound Inequalities
- To solve: Find the set of values that satisfy both inequalities.
- Example: Solve \(3 < x + 2 < 7\)
- Subtract 2 from all parts: \(1 < x < 5\)
Solving "Or" Compound Inequalities
- To solve: Find values that satisfy at least one of the inequalities.
- Example: Solve \(x \leq -3$\)or \(x \geq 4\)
Graphing Compound Inequalities
- "And" inequalities: Graph the intersection of the two inequalities.
- "Or" inequalities: Graph the union of the two inequalities.
R Example: Graphing "And" Compound Inequalities
plot(NULL, xlim=c(0,10), ylim=c(0,1), xlab="x", ylab="", axes=F)
abline(v=3, col="red")
abline(v=7, col="blue")
segments(3, 0.5, 7, 0.5, col="green", lwd=2)
R Example: Graphing "Or" Compound Inequalities
plot(NULL, xlim=c(-10,10), ylim=c(0,1), xlab="x", ylab="", axes=F)
abline(v=-3, col="red")
abline(v=4, col="blue")
segments(-10, 0.5, -3, 0.5, col="green", lwd=2)
segments(4, 0.5, 10, 0.5, col="green", lwd=2)
Understanding and being able to solve and graph compound inequalities are fundamental skills in algebra. These concepts are not only useful in mathematical problem-solving but also in various applications where conditions can be complex and multi-faceted.
Table of Contents
- The Concept of Absolute Value Inequalities
- Solving Absolute Value Inequalities
- Example: Solving $ |x - 3| < 5 $
- R Code Example: Visualizing an Absolute Value Inequality
- Practice Problems
Absolute value inequalities involve expressions within absolute value symbols and are solved to find the range of values that satisfy the inequality. The absolute value of a number is its distance from zero on the number line, regardless of direction. This concept leads to two different scenarios when solving absolute value inequalities: either the expression inside the absolute value is positive or it's negative.
The Concept of Absolute Value Inequalities
The equation \( |x| = a $\)has two solutions: \( x = a $\)and \( x = -a \). When this is extended to inequalities, we consider two separate cases for \( |x| < a $\)and \( |x| > a \).
- For \( |x| < a \), the solution is \( -a < x < a \). This represents a range of values.
- For \( |x| > a \), the solution is divided into two parts: \( x > a $\)or \( x < -a \). This is because the expression inside the absolute value can be either positive or negative.
Solving Absolute Value Inequalities
- Isolate the absolute value expression.
- Determine the type of inequality: '<' leads to a conjunction (AND), '>' leads to a disjunction (OR).
- Solve the inequality for both the positive and negative scenarios.
Example: Solving \( |x - 3| < 5 \)
- Isolate the absolute value: \( |x - 3| < 5 \).
- Since it’s a '<' inequality, use conjunction (AND): \( -5 < x - 3 < 5 \).
- Solve for x: \( -2 < x < 8 \).
R Code Example: Visualizing an Absolute Value Inequality
library(ggplot2)
x_values <- seq(-10, 10, by = 0.1)
y_values <- abs(x_values - 3)
data <- data.frame(x = x_values, y = y_values)
ggplot(data, aes(x = x, y = y)) +
  geom_line() +
  geom_hline(yintercept = 5, linetype="dashed") +
  theme_minimal() +
  ggtitle("Graph of |x - 3| < 5")
Practice Problems
- Solve and graph \( |2x + 1| > 3 \).
- Solve \( |x - 4| \leq 6 $\)and represent the solution on a number line.
- For \( |3x - 5| < 7 \), determine the range of values for x.
This section provides a foundational understanding of absolute value inequalities, crucial for many mathematical applications. The combination of theoretical explanation and practical R examples helps to grasp the concept thoroughly.
Table of Contents
Table of Contents
The commutative property is a fundamental aspect of basic arithmetic and algebra. It states that the order in which two numbers are added or multiplied does not affect the final result. This property is applicable to addition and multiplication, but not to subtraction and division.
The Commutative Property of Addition
The commutative property of addition can be written in mathematical terms as: \\($ a + b = b + a $\) For example, \( 3 + 5 = 5 + 3 $\)which equals 8.
The Commutative Property of Multiplication
Similarly, the commutative property of multiplication is: \($ a \times b = b \times a $\) For instance, \( 4 \times 7 = 7 \times 4 $\)which equals 28.
These properties are useful in simplifying algebraic expressions and solving equations.
Examples in R
-
Demonstrating Commutative Property with Addition:
a <- 3 b <- 5 addition1 <- a + b addition2 <- b + a addition1 == addition2
-
Demonstrating Commutative Property with Multiplication:
c <- 4 d <- 7 multiplication1 <- c * d multiplication2 <- d * c multiplication1 == multiplication2
Understanding the commutative property is essential for learning more complex algebraic concepts and for efficient problem solving.
Table of Contents
The Associative Property is a fundamental principle in algebra that applies to addition and multiplication. It states that the way numbers are grouped in an addition or multiplication operation does not change the result. This property makes algebraic computations more flexible and straightforward and enable one to simplify and expand expressions.
Associative Property Explained
The Associative Property can be written in the form of two equations:
- For addition: \( (a + b) + c = a + (b + c) \)
- For multiplication: \( (a \times b) \times c = a \times (b \times c) \)
In both cases, the grouping of numbers (indicated by parentheses) can be changed without affecting the outcome.
Examples in R
To demonstrate the Associative Property, we can use simple arithmetic operations in R.
Addition Example
a <- 5
b <- 3
c <- 2
# Check if (a + b) + c equals a + (b + c)
sum1 <- (a + b) + c
sum2 <- a + (b + c)
sum1 == sum2
Multiplication Example
# Check if (a * b) * c equals a * (b * c)
product1 <- (a * b) * c
product2 <- a * (b * c)
product1 == product2
Visualizing the Associative Property
We can also create a simple plot to visually represent the Associative Property. Let's plot the equation \( (a + b) + c $\)and \( a + (b + c) $\)to show they yield the same result.
library(ggplot2)

df <- data.frame(x = 1:10, y1 = ((1:10) + 2) + 3, y2 = (1:10) + (2 + 3))

ggplot(df, aes(x)) +
  geom_line(aes(y = y1, color = "(a + b) + c")) +
  geom_line(aes(y = y2, color = "a + (b + c)")) +
  labs(title = "Visualizing the Associative Property",
       x = "a",
       y = "Result",
       color = "Equation")
In this plot, the two lines representing \( (a + b) + c $\)and \( a + (b + c) $\)should overlap, illustrating that the result remains the same regardless of how the numbers are grouped.
Understanding and applying the Associative Property simplifies algebraic operations and aids in problem-solving in more complex algebraic expressions.
Table of Contents
The distributive property is a fundamental concept in algebra that allows you to multiply a single term by two or more terms inside a parenthesis in an expression. It's represented by the formula \( a(b + c) = ab + ac \). This property is essential for simplifying and solving algebraic expressions and equations.
Distributive Property Basics
The distributive property states that multiplying a number by a sum is the same as doing each multiplication separately. For example, \( 3 \times (4 + 5) $\)is the same as \( 3 \times 4 + 3 \times 5 \).
Example 1: Numeric Example
\( 2(3 + 4) = 2 \times 3 + 2 \times 4 = 6 + 8 = 14 \)
Example 2: Algebraic Example
If you have \( x(2 + y) \), using the distributive property, it becomes \( 2x + xy \).
Application in R
We can illustrate this property using R to compute numerical examples.
a <- 2
b <- 3
c <- 4
result <- a * (b + c) # Using the distributive property
result_expanded <- a * b + a * c # Expanded form
result == result_expanded # Should return TRUE
Visualizing Distributive Property
We can also use R to create a simple visualization of the distributive property. Let's take \( 2(3 + 4) $\)as an example. We will represent this calculation graphically.
library(ggplot2)

# Define the values
a <- 2
b <- 3
c <- 4

# Create a data frame for plotting
data <- data.frame(x = c(rep(1, b), rep(2, c)),
                   y = c(1:b, 1:c),
                   group = c(rep("b", b), rep("c", c)))

# Plot
ggplot(data, aes(x = factor(x), y = y, fill = group)) +
  geom_tile(color = "white", linewidth = 0.7) +
  scale_fill_manual(values = c("blue", "red")) +
  theme_minimal() +
  labs(title = "Visualizing the Distributive Property: 2(3 + 4)",
       subtitle = "Two groups representing 3 (blue) and 4 (red) multiplied by 2",
       x = "",
       y = "") +
  scale_x_discrete(labels = c("3 (b)", "4 (c)")) +
  theme(legend.position = "none")
Conclusion
The distributive property is a powerful tool in algebra. It helps simplify expressions and solve equations by distributing a multiplier over a set of addends. Understanding this property is fundamental to advancing in algebra and other areas of mathematics.
Table of Contents
- Exponents
- Radicals
- R Examples: Graphing Exponential Functions
- R Examples: Plotting Radical Functions
Exponents and radicals are fundamental concepts in algebra that relate to the repeated multiplication of a number. Exponents, often called "powers," are a way to express the multiplication of a number by itself a certain number of times. Radicals, commonly known as "roots," are the inverse operation of exponentiation.
Exponents
The expression \( a^n $\)means that the base \( a $\)is multiplied by itself \( n $\)times. For example, \( 3^4 $\)is \( 3 \times 3 \times 3 \times 3 \).
Basic Exponent Rules
- Product Rule: \( a^m \times a^n = a^{m+n} \)
- Quotient Rule: \( \frac{a^m}{a^n} = a^{m-n} \)
- Power Rule: \( (a^m)^n = a^{m \times n} \)
Radicals
A radical expression like \( \sqrt[n]{a} $\)is the inverse of raising \( a $\)to the power of \( n \). Thus, \( \sqrt[n]{a^n} = a \).
Simplifying Radicals
Simplifying a radical involves finding the root of the number under the radical sign. For example, \( \sqrt{9} = 3 $\)because \( 3^2 = 9 \).
Rationalizing Radicals
Rationalizing a radical means eliminating the radical from the denominator of a fraction. For example, to rationalize \( \frac{1}{\sqrt{2}} \), multiply the numerator and denominator by \( \sqrt{2} $\)to get \( \frac{\sqrt{2}}{2} \).
R Examples: Graphing Exponential Functions
To visualize exponential growth, we can graph an exponential function using R.
library(ggplot2)
x <- seq(-2, 2, by = 0.1)
y <- 2^x
ggplot(data.frame(x, y), aes(x, y)) +
    geom_line() +
    ggtitle("Graph of 2^x") +
    xlab("x") +
    ylab("2^x")
R Examples: Plotting Radical Functions
Similarly, we can graph a simple radical function, like \( y = \sqrt{x} \), to understand its behavior.
library(ggplot2)
x <- seq(0, 10, by = 0.1)
y <- sqrt(x)
ggplot(data.frame(x, y), aes(x, y)) +
    geom_line() +
    ggtitle("Graph of sqrt(x)") +
    xlab("x") +
    ylab("sqrt(x)")
Understanding exponents and radicals is crucial in algebra as they form the basis for more complex topics like logarithms, polynomial equations, and calculus.
Table of Contents
Understanding the properties of logarithms is crucial for simplifying complex logarithmic expressions and solving logarithmic equations.
Key Properties of Logarithms
The logarithm of a number is the exponent to which a base must be raised to yield that number. For example, in \(\log_b x = y\), \(b^y = x\). The base \(b$\)is typically 10 (common logarithm) or \(e$\)(natural logarithm).
- Product Rule: \(\log_b(mn) = \log_b m + \log_b n\)
- Quotient Rule: \(\log_b\left(\frac{m}{n}\right) = \log_b m - \log_b n\)
- Power Rule: \(\log_b(m^n) = n \cdot \log_b m\)
- Change of Base Formula: \(\log_b x = \frac{\log_k x}{\log_k b}$\)for any base \(k\)
- Logarithm of 1: \(\log_b 1 = 0$\)since \(b^0 = 1\)
- Logarithm of the Base: \(\log_b b = 1$\)since \(b^1 = b\)
R Code Examples
Let's explore some of these properties with R code examples.
Product Rule Example
log2(3*7) # Expected to be log2(3) + log2(7)
log2(3) + log2(7)
Quotient Rule Example
log10(100/20) # Expected to be log10(100) - log10(20)
log10(100) - log10(20)
Power Rule Example
log(8^2, base = 8) # Expected to be 2 * log(8, base = 8)
2 * log(8, base = 8)
Change of Base Example
log(5, base = 2) # Using Change of Base Formula
log(5) / log(2)
Visualizing Logarithmic Functions
Visualizing logarithmic functions helps in understanding their behavior.
Plot of Natural Logarithm Function
plot(0:10, log(1:11), type='o', col='blue', xlab='x', ylab='ln(x)')
Plot of Common Logarithm Function
plot(0:10, log10(1:11), type='o', col='red', xlab='x', ylab='log10(x)')
Understanding these properties and being able to visualize logarithmic functions are essential skills in algebra, especially for applications in higher mathematics and computational fields.
Table of Contents
Table of Contents
- Concept of Common Factors
- Identifying the GCF
- Factoring Out the GCF
- Examples
- R Code Example
- Practice Problems
Factoring common factors involves identifying and extracting the greatest common factor (GCF) from a polynomial. This technique simplifies expressions and is fundamental in solving algebraic equations. The GCF of a set of terms is the largest expression that divides all of them without a remainder.
Concept of Common Factors
The common factor in a set of terms is a term that divides each of them evenly. The greatest common factor is the largest of these common factors. For example, in the expression \( 4x^3 + 8x^2 \), both terms are divisible by \( 4x^2 \), making it their GCF.
Identifying the GCF
To find the GCF of an algebraic expression:
- List the factors of each term.
- Identify the common factors.
- Choose the largest factor common to all terms.
Factoring Out the GCF
Once the GCF is identified, the expression can be rewritten as the product of the GCF and another expression. For instance, factoring \( 4x^3 + 8x^2 $\)by its GCF \( 4x^2 $\)gives \( 4x^2(x + 2) \).
Examples
Here are some examples of factoring common factors in algebraic expressions:
Example 1: \( 6x^2 + 12x \)
- Factors of \( 6x^2 \): \( 1, 2, 3, 6, x, x^2, 2x, 3x, 6x, 2x^2, 3x^2, 6x^2 \)
- Factors of \( 12x \): \( 1, 2, 3, 4, 6, 12, x, 2x, 3x, 4x, 6x, 12x \)
- GCF: \( 6x \)
- Factored form: \( 6x(x + 2) \)
Example 2: \( 9y^3 - 3y^2 + 6y \)
- Factors of \( 9y^3 \): \( 1, 3, 9, y, y^2, y^3, 3y, 9y, 3y^2, 9y^2, 3y^3, 9y^3 \)
- Factors of \( 3y^2 \): \( 1, 3, y, y^2, 3y, 3y^2 \)
- Factors of \( 6y \): \( 1, 2, 3, 6, y, 2y, 3y, 6y \)
- GCF: \( 3y \)
- Factored form: \( 3y(3y^2 - y + 2) \)
R Code Example
We can use R to visualize the process of finding GCFs. Let's plot a simple bar graph showing the factors of two numbers and highlight their GCF.
x <- c(1, 2, 4, 8)
y <- c(1, 2, 3, 6, 9, 18)
common_factors <- intersect(x, y)

barplot(c(table(x), table(y)), beside=TRUE, col=c(rep("blue", length(x)), rep("red", length(y))),
        legend.text=c("Factors of 8", "Factors of 18"))
abline(h=common_factors, col="green", lwd=2)
title("Common Factors of 8 and 18")
Practice Problems
- Factor out the GCF from the following expressions:
- \( 15x^4 - 25x^3 \)
- \( 7y^2 + 14y - 21 \)
Understanding and applying the concept of factoring common factors is crucial in algebra, especially when simplifying expressions and solving equations.
Table of Contents
Factoring trinomials is a fundamental skill in algebra that involves breaking down a polynomial into simpler factors. A trinomial is a polynomial with three terms, typically in the form \( ax^2 + bx + c \), where \( a \), \( b \), and \( c $\)are constants. The goal of factoring is to express the trinomial as a product of two binomials.
The Process of Factoring Trinomials
To factor a trinomial of the form \( ax^2 + bx + c \), we look for two binomials \( (dx + e) $\)and \( (fx + g) $\)such that when multiplied together, they give the original trinomial. The process involves finding pairs of numbers that add up to \( b $\)and multiply to \( ac \).
Example 1: Factoring Simple Trinomials
Consider the trinomial \( x^2 + 5x + 6 \). We need to find two numbers that add up to 5 and multiply to 6. The numbers 2 and 3 fit these criteria, so the trinomial can be factored as: \($ x^2 + 5x + 6 = (x + 2)(x + 3) $\)
Example 2: Factoring Complex Trinomials
Consider \( 2x^2 + 7x + 3 \). We find two numbers that add up to 7 and multiply to \( 2 \times 3 = 6 \). The numbers 1 and 6 work here, leading to: \($ 2x^2 + 7x + 3 = (2x + 1)(x + 3) $\)
Visualizing Trinomial Factoring with R
To better understand trinomial factoring, we can visualize the roots of the polynomial and its factors using R. Let's take the trinomial \( x^2 - 3x - 4 $\)and visualize its factoring.
library(ggplot2)

# Define the trinomial and its factors
trinomial <- function(x) x^2 - 3*x - 4
factor1 <- function(x) x - 4
factor2 <- function(x) x + 1

# Create a sequence of x values
x_values <- seq(-10, 10, by = 0.1)

# Compute y values for the trinomial and its factors
y_trinomial <- trinomial(x_values)
y_factor1 <- factor1(x_values)
y_factor2 <- factor2(x_values)

# Plot the functions
ggplot(data.frame(x = x_values, y = y_trinomial), aes(x, y)) +
  geom_line(color = 'blue') +
  geom_line(aes(y = y_factor1), color = 'red') +
  geom_line(aes(y = y_factor2), color = 'green') +
  labs(title = "Factoring Trinomials", x = "x", y = "y")
In this visualization, the blue line represents the trinomial, while the red and green lines represent its factors. The points where these lines intersect the x-axis indicate the roots of the trinomial and its factors.
Table of Contents
- Why is it Important?
- Real-World Application
- Examples
- R Code Example: Plotting a Difference of Squares
The concept of the "Difference of Squares" is a fundamental algebraic technique used in factoring expressions. It is based on the simple identity:
\\($ a^2 - b^2 = (a + b)(a - b) $\)
This identity states that the difference between the squares of two numbers, \(a$\)and \(b\), can be factored into the product of the sum and the difference of those two numbers.
Why is it Important?
Understanding and applying the difference of squares is crucial in simplifying algebraic expressions, solving equations, and even in more advanced topics like calculus.
Real-World Application
This concept finds applications in various fields including engineering, physics, and economics, where it helps in simplifying and solving complex problems.
Examples
-
Factoring \( x^2 - 9 \): Here, \(a = x$\)and \(b = 3$\)(since \(3^2 = 9\)). So, \( x^2 - 9 = (x + 3)(x - 3) \).
-
Factoring \( 25y^2 - 16 \): Here, \(a = 5y$\)and \(b = 4$\)(since \(4^2 = 16\)). Thus, \( 25y^2 - 16 = (5y + 4)(5y - 4) \).
R Code Example: Plotting a Difference of Squares
Let's use R to plot a graph of \( y = x^2 - 9 $\)to visualize the concept.
x <- seq(-10, 10, by=0.1)
y <- x^2 - 9
plot(x, y, type='l', main='Graph of y = x^2 - 9', xlab='x', ylab='y')
The graph will help visualize how the expression behaves for different values of \(x\).
Remember, the key to mastering the difference of squares is practice and application. Try factoring different expressions using this technique to enhance your understanding.
Table of Contents
Perfect square trinomials are a form of quadratic expression that can be factored into the square of a binomial. They have a specific pattern: \\( a^2 + 2ab + b^2 = (a + b)^2 $\)or \\( a^2 - 2ab + b^2 = (a - b)^2 \). Recognizing these patterns is key to factoring them efficiently.
Factoring Perfect Square Trinomials
A perfect square trinomial is formed by squaring a binomial. It looks like this: \\( (x + a)^2 = x^2 + 2ax + a^2 $\)or \\( (x - a)^2 = x^2 - 2ax + a^2 \).
Examples
-
Factor \\( x^2 + 6x + 9 \). \\( x^2 + 6x + 9 = (x + 3)^2 \), because \\( 3^2 = 9 $\)and \\( 2 \cdot x \cdot 3 = 6x \).
-
Factor \\($ x^2 - 10x + 25 $\). \\( x^2 - 10x + 25 = (x - 5)^2 \), because \\( 5^2 = 25 $\)and \\( -2 \cdot x \cdot 5 = -10x \).
Checking Our Work with R
We can use R to verify the factoring of perfect square trinomials.
# Define the binomial as a function
f1 <- function(x) { (x + 3)^2 }
f2 <- function(x) { (x - 5)^2 }

# Evaluate the function at different points
f1(1) # Should return 16 (1 + 3)^2
f2(2) # Should return 9 (2 - 5)^2
Visualizing Perfect Square Trinomials
We can plot a perfect square trinomial to see its parabolic shape, which is characteristic of quadratic functions.
Plot Example
Let's plot \\($ x^2 + 6x + 9 $\).
x <- seq(-10, 10, by = 0.1)
y <- x^2 + 6*x + 9
plot(x, y, type='l', main="Plot of x^2 + 6x + 9", xlab="x", ylab="y")
Understanding the structure of perfect square trinomials and how to factor them is essential in algebra. It not only simplifies expressions but also aids in solving quadratic equations and understanding the properties of quadratic functions.
Table of Contents
- Key Steps in Factoring by Grouping
- Example 1: Factoring a Four-Term Polynomial
- Example 2: Factoring a Polynomial with Multiple Terms
- Visualizing Polynomial Factoring
Factoring by grouping is a method used in algebra to factor certain types of polynomials. It is particularly useful when a polynomial does not have any common factors and cannot be factored by simpler methods like factoring a trinomial or a difference of squares. The process involves grouping terms in the polynomial in a way that allows us to factor out common terms and simplify the expression.
Key Steps in Factoring by Grouping
- Group the terms in pairs or sets that seem to have common factors.
- Factor out the greatest common factor (GCF) from each group.
- If the resulting groups share a common factor, factor this out.
Example 1: Factoring a Four-Term Polynomial
Let's consider the polynomial \( ax^3 + bx^2 + ay + b \). To factor this by grouping:
-
Group the terms: \( (ax^3 + bx^2) + (ay + b) \).
-
Factor out the GCF from each group: \( x^2(ax + b) + 1(ay + b) \).
-
Notice the common binomial factor \( (ax + b) \).
-
Factor out \( (ax + b) \): \( (ax + b)(x^2 + 1) \).
R code to demonstrate polynomial manipulation
library(polynom) p <- polynomial(c(1, 1, 1, 1)) # Represents ax^3 + bx^2 + ay + b
Display the polynomial
p
Example 2: Factoring a Polynomial with Multiple Terms
Consider the polynomial \( 3x^3 + 6x^2 + 4x + 8 \). We apply factoring by grouping:
-
Group terms: \( (3x^3 + 6x^2) + (4x + 8) \).
-
Factor out GCF from each group: \( 3x^2(x + 2) + 4(x + 2) \).
-
Factor out the common binomial \( (x + 2) \): \( (x + 2)(3x^2 + 4) \).
R code to demonstrate polynomial manipulation
library(polynom) p2 <- polynomial(c(8, 4, 6, 3)) # Represents 3x^3 + 6x^2 + 4x + 8
Display the polynomial
p2
Visualizing Polynomial Factoring
We can use R to plot the original polynomial and its factored form to visualize how the factoring simplifies the expression.
library(ggplot2)
library(polynom)
p2 <- polynomial(c(8, 4, 6, 3))
x_vals <- seq(-10, 10, by = 0.1)
y_vals <- predict(p2, x_vals)
data <- data.frame(x = x_vals, y = y_vals)
ggplot(data, aes(x, y)) + geom_line() + ggtitle("Polynomial Factoring Visualization")
This document offers a basic introduction to the concept of factoring by grouping in algebra, with examples and visualizations using R. For more complex polynomials, the method follows the same principle but might require more intricate grouping and factoring steps.
Table of Contents
Table of Contents
Line equations are a fundamental concept in algebra, representing the relationship between two variables in a linear format. The most common form of a line equation is the slope-intercept form, given by \( y = mx + b \), where \( m $\)is the slope and \( b $\)is the y-intercept of the line. This form is particularly useful as it provides a direct way to understand the line's gradient and where it intersects the y-axis.
The Slope (\( m \))
The slope of a line measures its steepness and direction. A positive slope means the line is rising, while a negative slope indicates it is falling. The slope is calculated as the ratio of the vertical change (\( \Delta y \)) to the horizontal change (\( \Delta x \)) between two points on the line: \( m = \frac{\Delta y}{\Delta x} \).
The Y-Intercept (\( b \))
The y-intercept is the point where the line crosses the y-axis. It is represented by the variable \( b $\)in the equation \( y = mx + b \). This value indicates the value of \( y $\)when \( x = 0 \).
Plotting a Line Equation
To plot a line, one needs at least two points. By choosing any two values for \( x \), we can find the corresponding \( y $\)values and plot these points to draw the line.
Example: Plotting a Line in R
Here is an example of how to plot a line using the R programming language. We will plot the line defined by the equation \( y = 2x + 3 \).
x <- -10:10
y <- 2 * x + 3
plot(x, y, type = 'l', col = 'blue', main = 'Plot of the line y = 2x + 3')
Finding the Equation of a Line
To find the equation of a line, one needs either:
- Two points on the line.
- The slope and one point on the line.
Example: Deriving Line Equation from Two Points
Suppose we have two points: \( P_1(1, 3) $\)and \( P_2(4, 11) \). We can find the slope \( m $\)and then use one of the points to find \( b \).
# Coordinates of the points
x1 <- 1; y1 <- 3
x2 <- 4; y2 <- 11

# Calculating the slope (m)
m <- (y2 - y1) / (x2 - x1)

# Calculating the y-intercept (b)
b <- y1 - m * x1

# Displaying the line equation
cat("The equation of the line is: y =", m, "x +", b)
Understanding line equations is crucial as they form the basis for more complex algebraic concepts like systems of equations and functions. Mastery of this topic lays the groundwork for further study in algebra and its applications in various fields, including AI development.
Table of Contents
Graphing linear equations is a fundamental concept in algebra. It involves plotting the solutions of a linear equation on a Cartesian coordinate system. A linear equation in two variables, typically x and y, can be written in the form y = mx + b, where m is the slope of the line and b is the y-intercept.
The Slope and Y-intercept
The slope, m, indicates the steepness and direction of the line. A positive slope means the line ascends from left to right, while a negative slope descends. The y-intercept, b, is the point where the line crosses the y-axis.
Plotting a Linear Equation
To plot a linear equation, we need at least two points. By choosing different values for x and solving for y, we can find these points.
Example: Plotting y = 2x + 3
Let's plot the linear equation y = 2x + 3 using R.
library(ggplot2)
x_values <- -10:10
y_values <- 2 * x_values + 3
df <- data.frame(x = x_values, y = y_values)
ggplot(df, aes(x = x, y = y)) + geom_line() +
  labs(title = "Graph of y = 2x + 3") +
  theme_minimal()
Finding Intercepts
- The y-intercept is found by setting x = 0 in the equation.
- The x-intercept is found by setting y = 0 and solving for x.
Example: Finding Intercepts for y = -x + 2
For the equation y = -x + 2, the y-intercept is at (0, 2), and the x-intercept can be found by setting y = 0.
x_intercept <- 2  # setting y = 0
y_intercept <- 2  # setting x = 0
df_intercepts <- data.frame(x = c(0, x_intercept), y = c(y_intercept, 0))
ggplot(df_intercepts, aes(x = x, y = y)) + geom_point() +
  labs(title = "Intercepts of y = -x + 2") +
  theme_minimal()
Graph Characteristics
- Slope: Determines the angle of the line.
- Intercepts: Points where the line crosses the axes.
- Parallel and Perpendicular Lines: Determined by slopes. Parallel lines have equal slopes, while perpendicular lines have slopes that are negative reciprocals of each other.
Understanding how to graph linear equations lays the groundwork for more advanced algebraic concepts, such as systems of equations and inequalities.
Table of Contents
The concept of slope and intercept is fundamental in the study of algebraic graphs, particularly when dealing with linear equations. The slope of a line measures its steepness, or the rate of change, while the intercepts are the points where the line crosses the axes.
Slope
The slope \( m $\)of a line is defined as the ratio of the change in the y-coordinate to the change in the x-coordinate between any two points on the line. Mathematically, it is expressed as:
\[m = \frac{\Delta y}{\Delta x} = \frac{y_2 - y_1}{x_2 - x_1}\]
Where \( (x_1, y_1) $\)and \( (x_2, y_2) $\)are any two points on the line.
y-Intercept
The y-intercept of a line is the point where the line crosses the y-axis. This is represented by the y-coordinate when \( x = 0 \).
x-Intercept
Similarly, the x-intercept is where the line crosses the x-axis, represented by the x-coordinate when \( y = 0 \).
Graphing a Line Using Slope and Intercept
A linear equation in the slope-intercept form is written as:
\[y = mx + b\]
Where \( m $\)is the slope and \( b $\)is the y-intercept.
x <- -10:10
m <- 2 # slope
b <- -3 # y-intercept
y <- m*x + b
plot(x, y, type = "l", col = "blue", xlab = "X-axis", ylab = "Y-axis", main = "Graph of y = mx + b")
abline(h=0, v=0, col="gray") # Adding axes
points(0, b, col = "red", pch = 19) # Highlighting the y-intercept
In this R code example, we plot the graph of a linear equation with a given slope \( m $\)and y-intercept \( b \). The plot function is used to draw the line, and the abline function adds horizontal and vertical axes. The points function highlights the y-intercept on the graph.
Understanding the slope and intercepts of a line is crucial in algebra, as it provides a way to visualize linear relationships and solve various mathematical problems.
Table of Contents
- Understanding Systems of Linear Equations
- Graphical Representation
- Solving Systems of Linear Equations
- R Examples: Solving Algebraically
- Conclusion
Systems of linear equations consist of two or more linear equations involving the same set of variables. The goal is to find values for the variables that satisfy all the equations simultaneously. Solutions can be visualized as the intersection points of lines in a graph. We'll explore methods to solve these systems, including graphically, algebraically (substitution and elimination methods), and using matrices.
Understanding Systems of Linear Equations
-
Definition: A system of linear equations is a set of two or more linear equations in the same variables. For example, a system with two equations in two variables (x and y) looks like:
\begin{align*} a_1x + b_1y &= c_1 \ a_2x + b_2y &= c_2 \end{align*}
-
Solution: A solution to the system is a set of values for x and y that makes both equations true simultaneously.
Graphical Representation
-
Each linear equation in a system can be represented as a line in a two-dimensional space. The intersection point of these lines is the solution to the system.
-
The R code below generates a plot of two linear equations.
x <- seq(-10, 10, by = 0.1) y1 <- 2*x + 3 y2 <- -x + 1 plot(x, y1, type='l', col='blue', ylim=c(-10, 10), xlab='x', ylab='y') lines(x, y2, col='red')
Solving Systems of Linear Equations
- Graphical Method: Plotting both equations and finding the intersection point.
- Algebraic Methods:
- Substitution: Solve one equation for one variable and substitute this into the other equation.
- Elimination: Add or subtract equations to eliminate one variable, making it easier to solve for the other.
- Matrix Method: Using matrix operations to solve the system (more advanced, typically covered in linear algebra courses).
R Examples: Solving Algebraically
-
Example of Substitution Method:
- Solve one equation for x or y.
- Substitute this expression into the other equation to find one variable.
- Use this value to find the other variable.
Example equations: y = 2x + 3 and y = -x + 1
solve_x <- function(y) {(y - 3) / 2} solve_y <- function(x) {-x + 1}
Substitute and solve
y_solution = solve_y(solve_x(1)) x_solution = solve_x(y_solution) c(x_solution, y_solution)
-
Example of Elimination Method:
- Multiply or divide equations to align coefficients.
- Add or subtract equations to eliminate one variable.
- Solve for the remaining variable.
Example equations: 2x + 3y = 5 and -x + 4y = 6
Align x coefficients and add the equations to eliminate x
(2x + 3y) + 2*(-x + 4y) = 5 + 2*6
solve_y_elimination <- function() { (5 + 26) / (3 + 24) } y_solution_elimination = solve_y_elimination() x_solution_elimination = (5 - 3*y_solution_elimination) / 2 c(x_solution_elimination, y_solution_elimination)
Conclusion
- Understanding systems of linear equations is crucial in algebra and forms the basis for more complex mathematical concepts. The methods described here provide a foundation for solving these systems, and mastering these techniques is essential for further studies in mathematics and related fields.
Table of Contents
Non-linear graphs represent equations that do not form straight lines when plotted. These graphs are crucial in understanding complex relationships in algebra, where the rate of change is not constant. Common types of non-linear graphs include parabolas, exponential curves, and circles.
Quadratic Graphs (Parabolas)
Quadratic functions are polynomial functions of degree 2, typically in the form \( f(x) = ax^2 + bx + c \). The graph of a quadratic function is a parabola. Depending on the value of \( a \), the parabola opens upwards (\( a > 0 \)) or downwards (\( a < 0 \)).
Example: Graph of \( f(x) = x^2 - 4x + 3 \)
x <- seq(-1, 5, by = 0.1)
y <- x^2 - 4*x + 3
plot(x, y, type="l", col="blue", main="Graph of f(x) = x^2 - 4x + 3")
Exponential Graphs
Exponential functions have the form \( f(x) = a \cdot b^x \), where \( b $\)is a positive real number. These graphs show growth or decay and are widely used in financial and scientific applications.
Example: Graph of \( f(x) = 2^x \)
x <- seq(-2, 2, by = 0.1)
y <- 2^x
plot(x, y, type="l", col="red", main="Graph of f(x) = 2^x")
Circular Graphs
Circular graphs represent equations in the form \( x^2 + y^2 = r^2 \), where \( r $\)is the radius of the circle. These are essential in trigonometry and geometry.
Example: Graph of a Circle with radius 2
theta <- seq(0, 2*pi, by = 0.01)
x <- 2 * cos(theta)
y <- 2 * sin(theta)
plot(x, y, type="l", asp=1, col="green", main="Circle with radius 2")
In summary, understanding non-linear graphs is essential for interpreting complex algebraic relationships. These graphs provide visual insight into the behavior of different types of equations, beyond the simplicity of linear relationships.
Table of Contents
Introduction
This document provides an overview of polynomials within the context of algebra and their significance in the development and functioning of Large Language Models (LLMs).
Polynomials in Algebra
Definition
Polynomials are algebraic expressions made up of variables and coefficients, involving operations of addition, subtraction, multiplication, and non-negative integer exponents of variables.
Importance in Algebra
Polynomials form a fundamental component of algebra. They represent a range of mathematical concepts from simple linear equations to complex expressions defining curves.
Polynomials in Large Language Models (LLMs)
Role of Polynomials in LLMs
In the realm of AI and machine learning, particularly in LLMs, polynomials play a critical role. They are instrumental in various aspects of model architecture and data processing.
Polynomial Transformations
Polynomial transformations are used in data preprocessing to capture non-linear relationships within the input data, enhancing the model's ability to learn and predict more complex patterns.
Optimization Algorithms
Many optimization algorithms, crucial for training LLMs, leverage polynomial functions. These algorithms often involve polynomial expressions in gradient descent methods to minimize error rates and improve model accuracy.
Understanding Non-linear Patterns
LLMs, like GPT-series models, need to understand and generate human language, which often involves recognizing patterns that are not linear. Polynomials, therefore, become a vital tool in achieving this complexity.
Conclusion
Understanding the role of polynomials in both algebra and AI, particularly in LLMs, is crucial for anyone venturing into the field of AI and machine learning. This document serves as a starting point to appreciate the significance of polynomials in these advanced technological domains.
Table of Contents
Polynomials are one of the most fundamental concepts in algebra. A polynomial is an expression consisting of variables (also known as indeterminates) and coefficients, that involves only the operations of addition, subtraction, multiplication, and non-negative integer exponentiation of variables. An example of a polynomial is \( x^2 - 4x + 7 \).
Polynomials: Definition and Basic Concepts
A polynomial can be expressed in the form: \($ P(x) = a_n x^n + a_{n-1} x^{n-1} + \dots + a_2 x^2 + a_1 x + a_0 $\) where \( n $\)is a non-negative integer and \( a_0, a_1, \dots, a_n $\)are constants known as coefficients. The degree of the polynomial is the highest power of \( x $\)that occurs in the polynomial.
Representation in R
Visualizing Polynomials
Understanding the shape and behavior of polynomial graphs is crucial. The degree of the polynomial often determines the general shape of the graph.
Polynomial Graph Example
library(ggplot2)

# Create a sequence of x values
x_values <- seq(-10, 10, by = 0.1)


# Evaluate the polynomial for each x value
y_values <- sapply(x_values, polynomial)

# Create a data frame for plotting
data <- data.frame(x = x_values, y = y_values)

# Plot the graph
ggplot(data, aes(x, y)) + geom_line() +
    labs(title = "Graph of a Polynomial", x = "x", y = "P(x)") +
    theme_minimal()
Polynomials are used in a wide range of mathematical and real-world applications, including curve fitting, calculus, and numerical analysis. They are particularly important in fields such as engineering, physics, economics, and, of course, mathematics.
In the subsequent sections, we will explore operations on polynomials, factoring techniques, solving polynomial equations, and graphing polynomials in greater detail.
Table of Contents
Polynomials are algebraic expressions that involve variables raised to whole number exponents and their coefficients. Operations on polynomials are foundational in algebra and include addition, subtraction, multiplication, and division. Understanding these operations is crucial for solving polynomial equations and modeling real-world scenarios in fields like engineering, economics, and natural sciences.
Addition and Subtraction
Polynomials are added or subtracted by combining like terms, which are terms with the same variables raised to the same power.
Example: Let's add \( P(x) = 2x^2 + 3x + 5 $\)and \( Q(x) = 3x^2 - 2x + 4 \). The result is \( (2x^2 + 3x^2) + (3x - 2x) + (5 + 4) = 5x^2 + x + 9 \).
Multiplication
When multiplying polynomials, each term of the first polynomial is multiplied by each term of the second polynomial, and then like terms are combined.
Example: Multiply \( P(x) = x - 2 $\)by \( Q(x) = x + 3 \). The result is \( P(x)Q(x) = x(x + 3) - 2(x + 3) = x^2 + 3x - 2x - 6 = x^2 + x - 6 \).
Division
Polynomial division can be performed using long division or synthetic division, and it's used to simplify expressions or solve polynomial equations.
Example: Divide \( P(x) = x^3 - 2x^2 + x - 1 $\)by \( Q(x) = x - 1 \).
R Example: Polynomial Division
To demonstrate polynomial division in R, we will use the '/' operator provided by the polynom package.
# Load the polynom package
library(polynom)

# Define the polynomials P and Q
P <- polynomial(c(-1, 1, -2, 1))
Q <- polynomial(c(-1, 1))

# Perform the division
division_result <- P / Q

# Print the result
print(division_result)
R Examples: Polynomial Operations
We'll now use R to perform these operations. R is a powerful tool for mathematical computations and can handle complex polynomial operations easily.
Addition Example
P <- polynomial(c(5, 3, 2))
Q <- polynomial(c(4, -2, 3))
result_add <- P + Q
print(result_add)
Subtraction Example
result_sub <- P - Q
print(result_sub)
Multiplication Example
result_mult <- P * Q
print(result_mult)
Division Example
This example will demonstrate polynomial division.
library(polynom)
P <- polynomial(c(-1, 1, -2, 1))
Q <- polynomial(c(-1, 1))
division_result <- divide(P, Q)
plot(division_result, main="Polynomial Division")
Understanding these basic operations is crucial for advancing in algebra and tackling more complex mathematical problems involving polynomials. By mastering polynomial operations, students can build a solid foundation for further studies in algebra and applied mathematics.
Table of Contents
Factoring polynomials is a fundamental concept in algebra that involves breaking down a polynomial into a product of simpler polynomials. This technique is essential for solving polynomial equations, simplifying expressions, and understanding polynomial functions.
Factoring Polynomials
Basics of Polynomials
Before diving into factoring, it's essential to understand what a polynomial is. A polynomial is a mathematical expression consisting of variables (also known as indeterminates), coefficients, and the operations of addition, subtraction, multiplication, and non-negative integer exponents of variables. For example, the expression \( P(x) = 4x^3 - 3x^2 + 2x - 1 $\)is a polynomial.
Factoring Techniques
-
Factoring out the Greatest Common Factor (GCF): The GCF of a polynomial is the largest polynomial that divides all terms of the polynomial. For instance, the GCF of \( 6x^2 $\)and \( 9x $\)is \( 3x \).
-
Factoring by Grouping: This technique is used when a polynomial can be separated into groups that each have a common factor.
-
Factoring Trinomials: This involves breaking down a trinomial into the product of two binomials. For example, factoring \( x^2 + 5x + 6 $\)results in \( (x + 2)(x + 3) \).
-
Special Products:
- Difference of Squares: \( a^2 - b^2 = (a - b)(a + b) \)
- Perfect Square Trinomial: \( a^2 \pm 2ab + b^2 = (a \pm b)^2 \)
R Code Examples
-
Finding GCF of Polynomial Coefficients
gcd <- function(a, b) { if(b == 0) return(a) else return(gcd(b, a %% b)) }
Example: GCF of 6 and 9
gcd(6, 9)
-
Visualizing Polynomial Factoring
For visualizing polynomial factoring, we can plot the original polynomial and its factors to understand how they relate.
library(ggplot2)
x <- seq(-10, 10, by = 0.1)
y <- x^2 + 5 * x + 6  # Example polynomial
y_factor1 <- x + 2  # First factor
y_factor2 <- x + 3  # Second factor

data <- data.frame(x, y, y_factor1, y_factor2)
ggplot(data) +
  geom_line(aes(x, y), color = "blue") +
  geom_line(aes(x, y_factor1), color = "red") +
  geom_line(aes(x, y_factor2), color = "green") +
  labs(title = "Polynomial and its Factors", x = "x", y = "y")
Conclusion
Factoring polynomials is a key skill in algebra that aids in solving equations, simplifying expressions, and understanding the behavior of polynomial functions. Through practice and understanding of the various factoring techniques, one can gain proficiency in this essential algebraic process.
Table of Contents
- Understanding Roots of Polynomial Equations
- Simple Polynomial Equation
- Graphing Polynomial Equations
- Higher-Degree Polynomials
- Factoring and the Rational Root Theorem
- Applications
Polynomial equations are mathematical expressions involving a sum of powers in one or more variables multiplied by coefficients. A general form of a polynomial equation in one variable (x) is \( a_n x^n + a_{n-1} x^{n-1} + \cdots + a_1 x + a_0 = 0 \), where \( a_n, a_{n-1}, \ldots, a_1, a_0 $\)are coefficients and n is a non-negative integer representing the degree of the polynomial.
Understanding Roots of Polynomial Equations
The roots (or zeros) of a polynomial are the values of x for which the polynomial equation equals zero. Finding these roots is a fundamental aspect of solving polynomial equations.
Simple Polynomial Equation
A simple polynomial equation might look like \( x^2 - 5x + 6 = 0 \). The roots can be found by factoring the polynomial or using the quadratic formula.
# Example: Solving x^2 - 5x + 6 = 0
poly_roots <- function(a, b, c) {
  discriminant = b^2 - 4*a*c
  root1 = (-b + sqrt(discriminant)) / (2*a)
  root2 = (-b - sqrt(discriminant)) / (2*a)
  return(c(root1, root2))
}
poly_roots(1, -5, 6) # Returns roots of the equation
Graphing Polynomial Equations
Understanding the graphical representation of polynomial equations is crucial. The roots of the polynomial are where the graph intersects the x-axis.
library(ggplot2)

# Define the polynomial function
polynomial <- function(x) { x^2 - 5*x + 6 }

# Generate data
x_values <- seq(-2, 7, by = 0.1)
y_values <- sapply(x_values, polynomial)

# Create a data frame for plotting
data <- data.frame(x = x_values, y = y_values)

# Plot
ggplot(data, aes(x, y)) +
  geom_line() +
  geom_hline(yintercept = 0, linetype="dashed") +
  ggtitle("Graph of x^2 - 5x + 6")
Higher-Degree Polynomials
Polynomials can have degrees higher than 2 (quadratic). For example, a cubic polynomial (\( x^3 \)) or a quartic polynomial (\( x^4 \)) have more complex behaviors and roots.
Factoring and the Rational Root Theorem
Factoring involves expressing the polynomial as a product of its factors. The Rational Root Theorem can be helpful in finding rational roots of polynomial equations.
Applications
Polynomial equations are essential in various fields, including physics, engineering, and economics. They help in modeling and solving real-world problems.
This document provides a basic introduction to polynomial equations, demonstrating solving and graphing using R. For more complex polynomials, techniques like synthetic division, the use of complex numbers, and numerical methods may be required.
Table of Contents
- Polynomial Functions
- Characteristics of Polynomial Graphs
- Graphing a Polynomial Function using R
- Interpreting Polynomial Graphs
- Challenges and Exercises
Polynomials are algebraic expressions made up of constants and variables combined using addition, subtraction, multiplication, and non-negative integer exponents. The process of graphing polynomials is essential in understanding their characteristics such as intercepts, turning points, and end behavior. This document aims to guide you through the basics of polynomial graphing, utilizing the R programming language for practical examples.
Polynomial Functions
Polynomials can be represented in the form \( P(x) = a_n x^n + a_{n-1} x^{n-1} + \dots + a_1 x + a_0 \), where \( a_n, a_{n-1}, \dots, a_1, a_0 $\)are constants and \( n $\)is a non-negative integer.
Characteristics of Polynomial Graphs
- Zeros/Roots: Points where \( P(x) = 0 \).
- Degree: The highest exponent of the polynomial. It influences the graph's end behavior and the maximum number of turning points.
- Leading Coefficient: The coefficient of the term with the highest exponent, affecting the graph's end behavior.
- Y-Intercept: The point where the graph crosses the y-axis (\( P(0) \)).
- Symmetry: Polynomials can be symmetric about the y-axis or the origin.
Graphing a Polynomial Function using R
-
Example 1: Quadratic Polynomial
library(ggplot2) x <- seq(-10, 10, by = 0.1) y <- x^2 - 4*x + 3 ggplot(data.frame(x, y), aes(x, y)) + geom_line() + ggtitle("Graph of y = x^2 - 4x + 3") + theme_minimal() -
Example 2: Cubic Polynomial
x <- seq(-10, 10, by = 0.1)
y <- x^3 - 3*x^2 + 2
ggplot(data.frame(x, y), aes(x, y)) +
  geom_line() +
  ggtitle("Graph of y = x^3 - 3x^2 + 2") +
  theme_minimal()
Interpreting Polynomial Graphs
- Analyze the zeros/roots, intercepts, and turning points.
- Examine the polynomial's degree and leading coefficient to determine the end behavior.
- Look for symmetry and any repeating patterns.
Challenges and Exercises
- Graph different polynomials and observe how changes in coefficients and exponents alter the graph.
- Explore the relationship between the polynomial's equation and its graphical representation.
In summary, graphing polynomials is a fundamental skill in algebra that helps in visualizing and understanding the behavior of polynomial functions. Through practice and exploration, one can gain deeper insights into these versatile and widely-used mathematical expressions.